When I published this course, the current version of the Raspberry operating system was version 8, codename “Jessie”.
Back then, the bench computer application ran on Python version 3.4.
It is now August of 2022, and my bench computer has been running non-stop, managing my bench-top functions such as the lights, soldering iron and hot air gun.
It’s been a few years since I published the course, and there are newer releases for the operating system and Python. So, I decided it was time for an update.
In the lectures of this new section, I’ll show you how to update the bench computer so that it runs on the latest currently available version of the Raspberry Pi operating system, which is version 11, nicknamed “Bullseye”, along with the Python interpreter that comes with Bullseye, which is version 3.9.2.
I have not changed the bench computer hardware in this update.
In this lecture, I’ll talk about the new content I’ve prepared for this update and how to approach this course if you are new to it or have already completed it.
What’s new
Let’s look at what has changed and what has remained the same.
What remains unchanged is the hardware. I continue to use the same Raspberry Pi 3 Model B I used to create this course, with the original 32 GB SD card, sensors, touchscreen, relay HAT and other components.
On the software side, bench computer Python code also remains unchanged.
The most significant change is the operating system. From the original Raspbian Jessie, the application now runs on Bullseye. As for the Python interpreter, I have opted to test and use the standard version of Python3 that comes with Bullseye, which is Python 3.9.2. When I created this course, the version of Python that came with Raspbian Jessie was 3.4.
I have also added the use of VNC as an easy and integrated way to have a graphical remote control interface for my Raspberry Pi. Besides accessing the Raspberry Pi desktop, VNC lets us quickly transfer files to and from the Raspberry Pi.
In this section, I’ll show you how to set up VNC in a dedicated lecture.
Update workflow
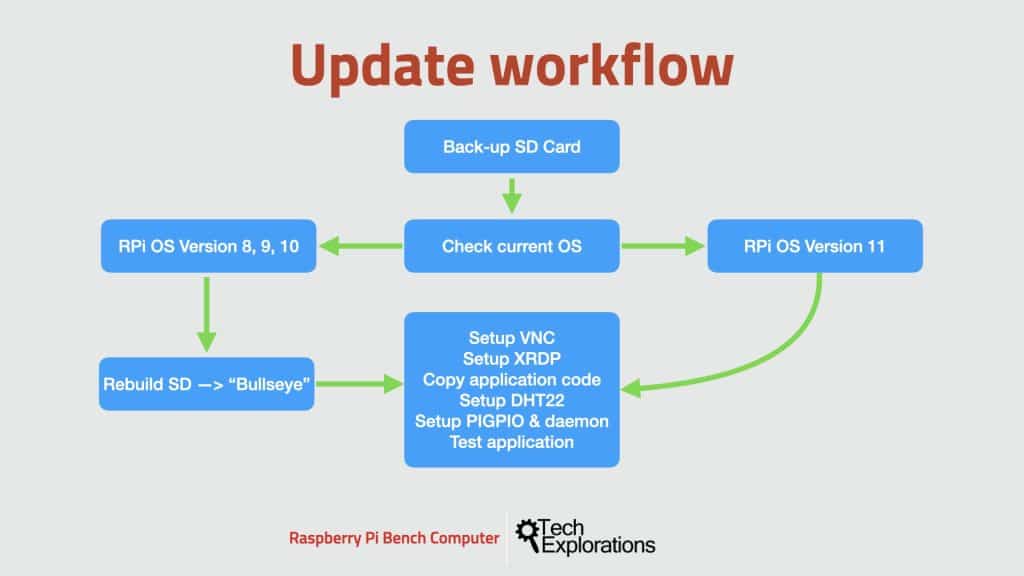
Here’s the updated workflow that I will be following in this section.
First, backup your SD card unless you are using a brand-new card. Also, remember to take backups of your SD card as you progress. This way, you can always roll back to a previous project state if something goes wrong.
Next, check which version of the Raspberry Pi operating system you use.
If, like me, you completed this course some time ago, and are using Raspberry Pi 8, 9, or 10, then you will need to upgrade your SD Card to version 11 Bullseye.
If you are new to this course and are already using Version 11, then you can skip this part and go straight to the bulk of the update process, which begins with the setup of VNC.
Once you have Raspberry Pi OS version 11 up and running, you can begin with the main part of the update workflow.
We’ll start by setting up the VNC remote control server on the Raspberry Pi and the client on your computer. We’ll use VNC later to copy the application files.
Next, we’ll set up XRDP and copy the original bench computer application code to the Raspberry Pi.
For the application to work, we’ll need to set up the DHT22 and PIGPIO Python modules and start the PIGPIO daemon. We’ll do all that is dedicated lectures.
Finally, we’ll test the bench application to ensure it works in the last lecture.
I have recorded a series of new lectures to help you update your Bench computer application.
You can find these lectures in a new section at the end of the course, titled “Bench Computer application update”.