Did you find an error in this page? Please report it. eBook version 12.
In this chapter, you will complete step six of the schematic design workflow, that you learned about in the second chapter of this part of the book. This chapter will show you how to use the Eeschema electrical rules checker (ERC) tool to ensure that your schematic does not contain errors that should be corrected before continuing with the layout workflow.
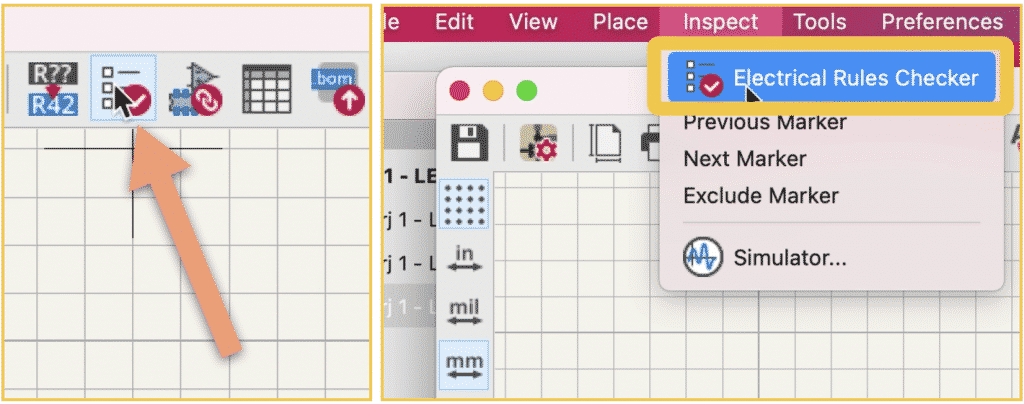
To use the ERC, invoke it by clicking on its button in the top toolbar or the Inspect menu (Figure 3.10.1).
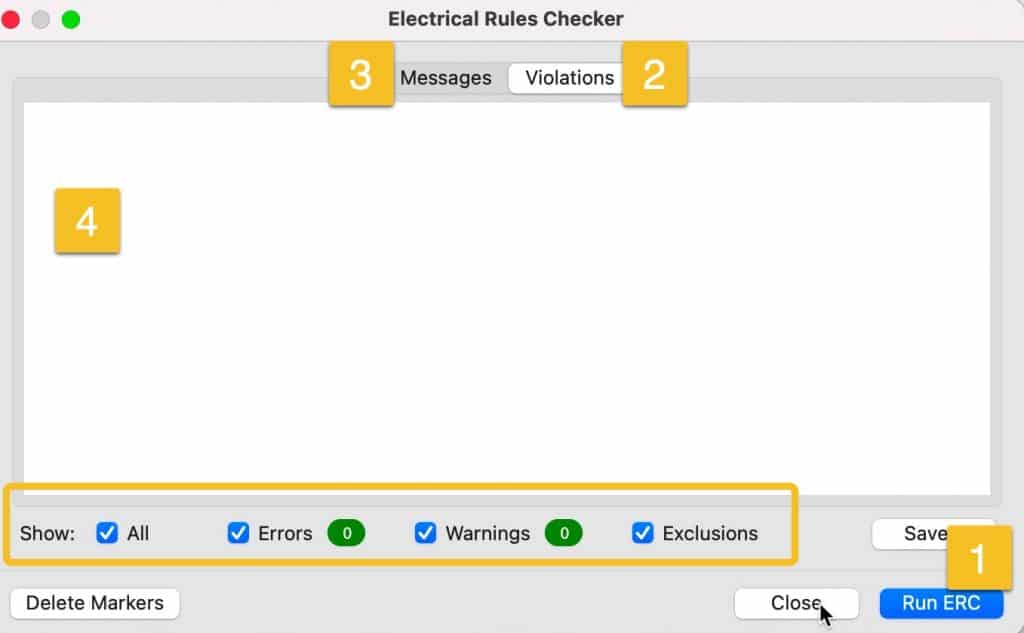
The ERC window will appear (see Figure 3.10.2 below). You can run the check immediately by clicking on “Run ERC” (1). The results in my example show zero errors and warnings (see box below). You can click on the Violations (2) and Messages (3) tabs to switch between the two types of output that the ERC can provide. You can also use the checkboxes at the bottom of the window to enable or disable the various message types.
Of course, we are working on a simple circuit, and I did not make any mistakes during the schematic workflow steps. I will deliberately delete the wire that connects the resistor to the switch and rerun the ERC. This time, the ERC reveals two violations (Figure 3.10.2):
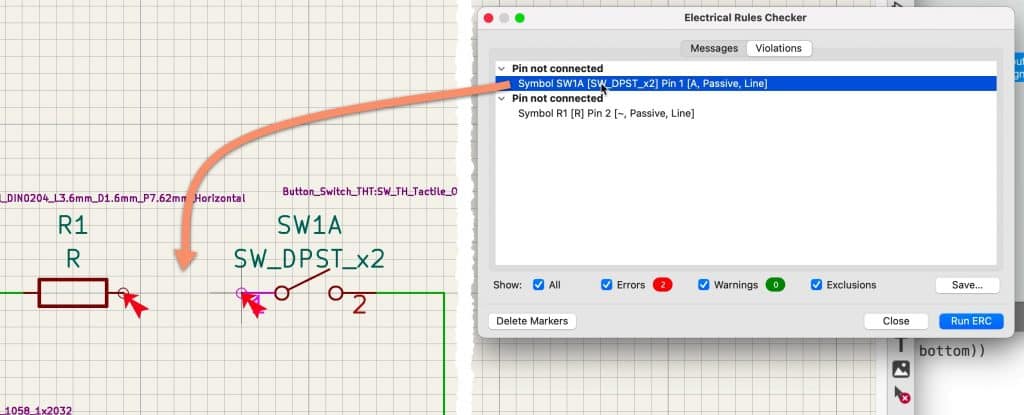
When you click on a violation in the ERC, the schematic editor in the background will pan to show you the location of the violation. There are also markers (arrows) that give you a visual clue as to its location. Use all the information that the ERC gives you to find and fix these violations before you continue. In the example above, the deleted wire caused two pins to be left unconnected. This is why the ERC lists the unconnected pins instead of the missing wire as the violation.
Go ahead and fix the violations by restoring the wire. Re-run the ERC to make sure that there are no remaining violations. Now that the ERC passes, there is one step left in the schematic design process. In this step, I will add comments and graphics to the schematic. This is the equivalent of adding explanatory comments to software source code. Let’s complete step seven in the next chapter.